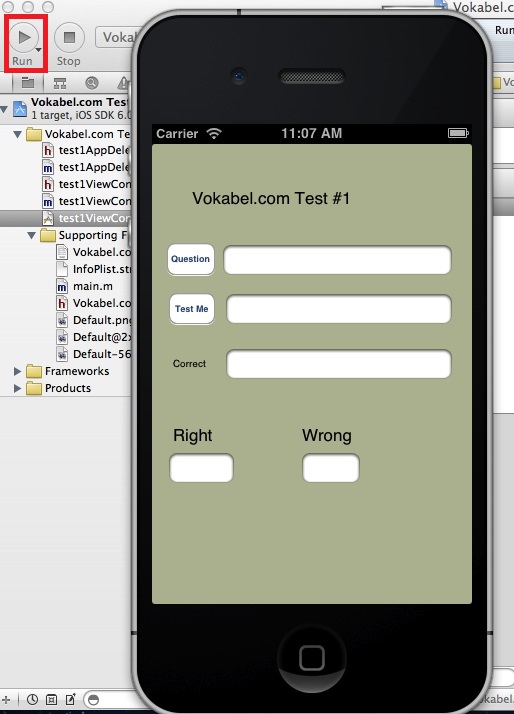
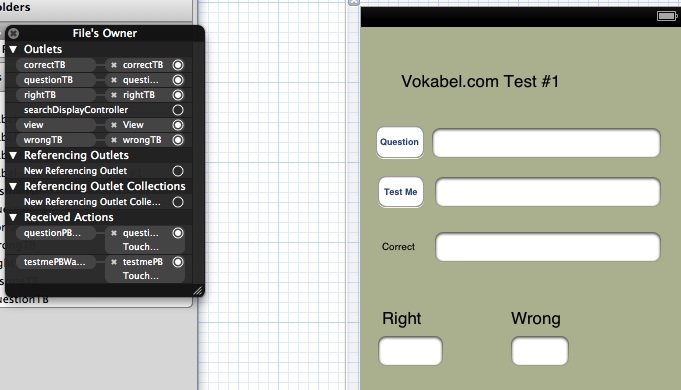
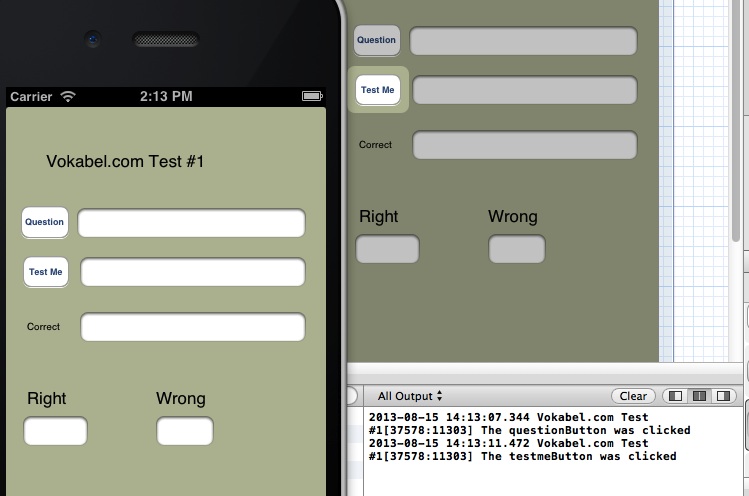
Now is a good time to compile and run the application to see if you get feedback in the console when the test button is clicked
(Shift-Command-R opens the console if it does not open automatically)
Building the Property List
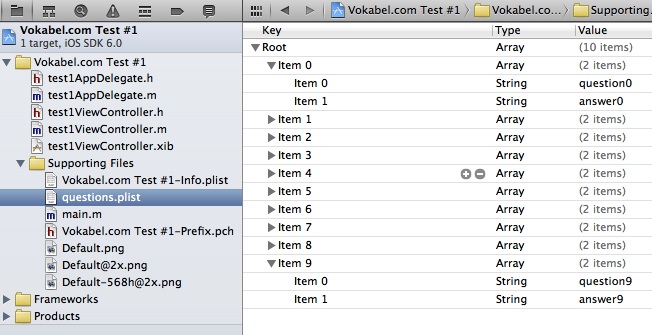
Since we are creating a test, it would make sense that the questions and answers would be paired together and should be accessible
via the same index (i.e. an array). The test would in turn be an array of these question/answer elements. In other words, we
will create a plist that is an array of an array of 2 strings (1 string is the question, the other is the answer).
- Right-Click on the project folder in the left hand pane file browser and select Add file. Click on Resource then plist.
Click on the new plist file in the file browser in the left-hand pane and change the name to "questions.plist"
- Right-click on the questions.plist file in the file browser in the left-hand pane. Select "Open As" Property List.
- Right-click on the root element and select Add Row. Change the type of the Root element to Array (click in the type cell to select
from a dropdown list). Change the type of the "Item 0" element you just created to Array as well.
- Right-click on the "Item 0" element and select Add Row twice (once for question, once for answer). Ensure that the type of the "Item 0"
and "Item 1" elements that you just created are String. Click on the value cell of each and
change the question value to the desired question, and the answer value to the desired answer.
- Right-click on the "Item 0" element again and select "Copy".
- Right-click on the Root element and select "Paste" for however questions/answers you want in your test.
This file should be the only modification you need to make apart from cosmetic changes to labels and titles if you want to
publish a new test.
The XML of the plist file may also be viewed by choosing the "Source Code" option when right-clicking on "Open As".
You next need to load this data into an array in working memory for the application to use. You should only have to do this once when the
application initially loads. To do this, modify the "viewDidLoad" method in the test1ViewController.m file. Note that it is always a good idea
to write the contents of the arrays out to the console to ensure that the contents of the plist resource loaded into your program successfully.
Since plist files are easily corrupted, you might have to recreate them to get them to work properly with your application.
Lastly, you should define the two arrays we'll be using (call them pair_array and pair), the question, the answer, the right_count, and the
wrong count in the .h header file because we will be using these throughout the application and not just locally. We are also instructing iOS
(through the property directive) to retain their values in
memory if a memory cleanup of the device is performed.
Don't forget to update your .m methods file with the synthesize directives for all variables declared through the
property directive in the .h file.
Programming the Retrieve Question Method
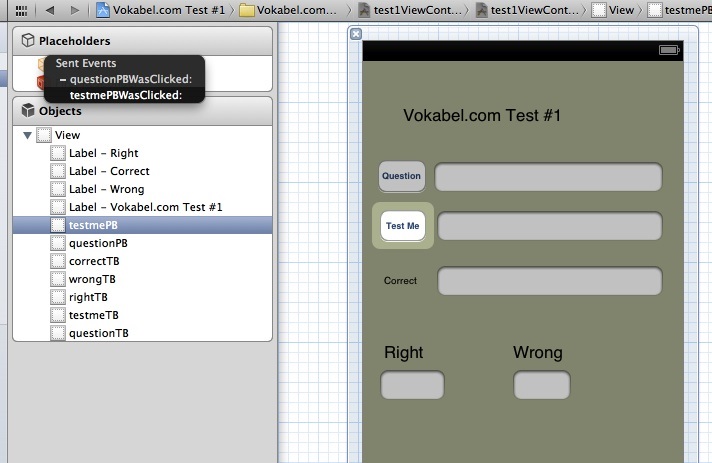
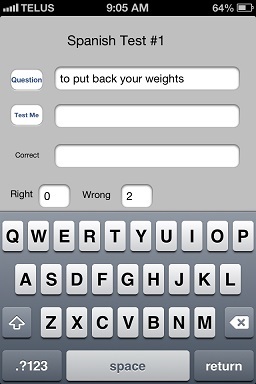
We now have to program the questionPBWasClicked method to retrieve a random question from the property list and
to display it in the questionTB text box. We will also retrieve the question and answer
from the arrays and save them to string variables. We also want to set the testme and correct text boxes to blank
in expectation of the user's answer.
Programming the Test Answer Method
Once the user has presumably typed their answer in the testmeTB textbox and clicked the testme button, we want to retrieve this answer and compare it
to the correct response as retrieved from the property list. If the response is correct we want to increment the value in
rightTB, otherwise we want to increment the value in wrongTB.
You should now have a fully functioning iOS testing application. You can put some final touches on it such as adding question/answer pairs to your plist file, rearranging the screen widgets so that they are all visible above the keyboard, commenting out any NSLog statements and changing the title.
Running the app on your device
- enroll in the iOS developer program ($99 per year as of this writing) here
- after you have registered and activated your developer account, itunes will automatically detect that your are a developer when you
plug in your device and will prompt you if you would like to use the device in question for development. (*important*, You should plug the
device into the computer you hope to do future development on). If you answer yes, your provisioning profile will have been created and all necessary
certificates and key files will have been created in your developer program account for download into your device
- go into xcode->window->organizer->provisioning profiles and ensure that a profile has been setup that will allow you to load your app into your device (note: the
provisioning profile will only be valid if it has been downloaded onto the same computer into which you plugged the first device into in the step above
when creating the initial profile),
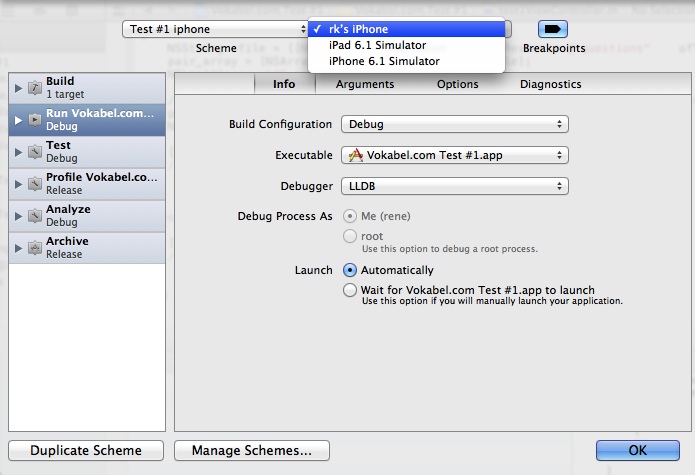
- you can now use your device instead of the simulator for testing an application on your device. To switch between the simulator and the device
as the targets when running your application from xcode, go to the Product->Scheme menu and edit the scheme to send output to
the appropriate target:
- Plug your device into the computer that you are compiling the app on. You will be prompted if you wish to install the key onto your device and after you answer yes, you should see an icon of your app in your apps
list that you should now be able to run and test (even after you unplug the device).
Creating your own icons for distribution
You probably noticed that the app icon is a boring white square so we might want to change it to something better.
- save the image that you would like as an icon as a .png file in a tool like Paintbrush or iPhoto
- the requirements for all of the icons needed when submitting your app for verification are very difficult to track. The
makeappicon.com site creates all requisite icons for both iphone/ipod/ipad and Android developers.
Just upload your .png file to the site and a .zip file containing all of the required images will be emailed to you.
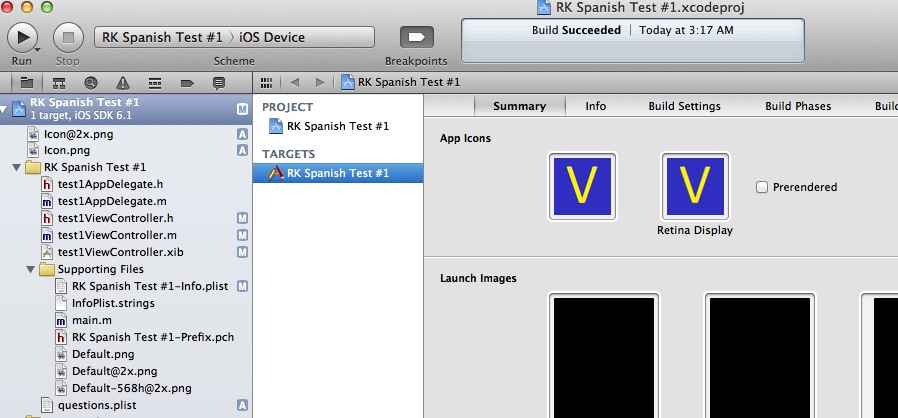
- Once you receive the email, open the ios folder and drag the Icon.png to the first box in your project->summary tab's "app icon" section. Then,
drag the Icon@x2.png file to the second box with retinal display printed underneath it.
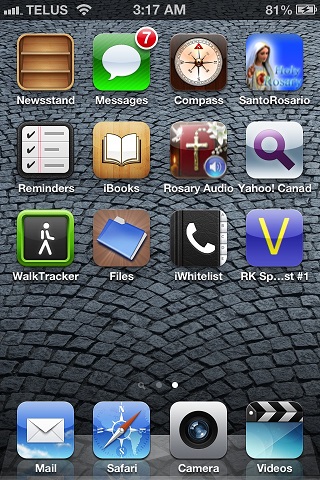
- while the device is connected, delete the current app from your device through the itunes apps tab.Then, rebuild your app with output set to
your device and the app with the new icon should appear on your screen.
Try using Voice Input for your Answers
One advantage of using an iOS app for vocabulary tests would be the possibility of entering your response verbally through the iPhone's microphone.
To do this, you would need an iPhone 4S+ or an ipad 3+ (if you also compiled your app for the ipad).
- Ensure that you have a connection to the internet
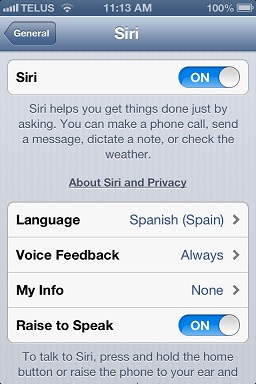
- On your iPhone, go to Settings->General->Siri . Switch it to On, Enable Siri. Select the Language that you want to answer with
- Go to Settings->General->International and select the language that matches the one that you selected in the previous step.
- Bring up the test. When you are ready to answer, go to the numeric keypad and click the microphone. (the microphone will appear on the normal keypad
after first use).Make sure the keyboard matches the one you are using or it may interpret your response in a different language (use the globe key
to switch keyboards).

- Speak the answer into the microphone and click on the DONE button
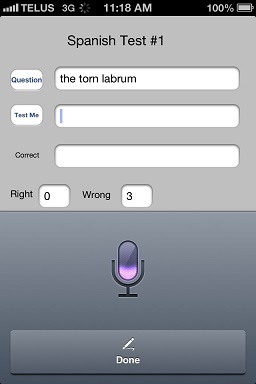
- Your answer should fill in the text box where you would normally type your response. (it is also a way you could check your pronunciation)
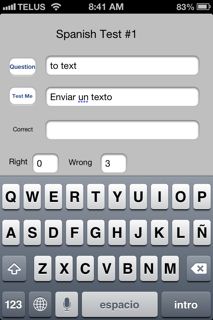
Siri also works to fill in text fields in the canned tests or the self-created html tests. It does, however, always
capitalize the first letter so you might want to take this into account when setting the answer.
Cloning a project for a new word list
Cloning a project can be awkward from within the xcode development environment. I do most of the cloning work at the file system level by replacing
the new files of a newly-created project with the original's. What I usually do if I want to keep my old test but
also create a new one is the following:
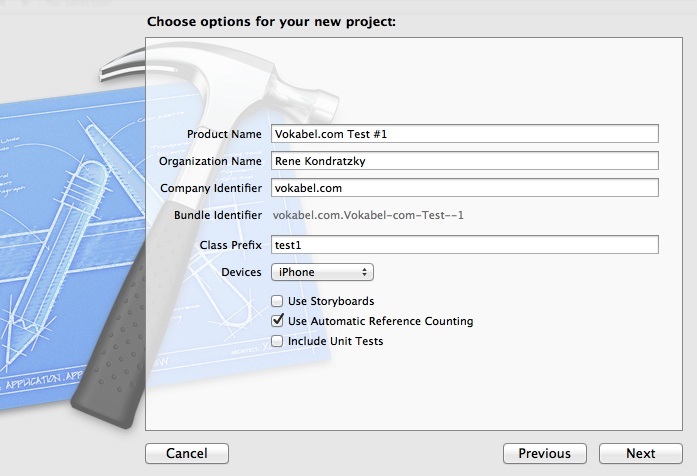
- create a new project with a different product name but identical other settings as the original project. It is especially important that the
class prefix value be the same as the original.
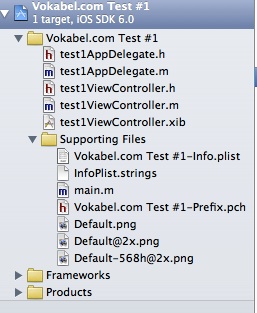
- Copy all *ViewController.m and *ViewController.h files from your original project folder on your Macbook to your new project's project folder.
- Copy the .xib file from the en.lproj folder of the original project to the en.lproj folder of the new project.
- In the new project, create a questions.plist file using the same procedure you used to create the original. (just create the file, you don't
have to add the data)
- Copy the questions.plist file from your original implementation (or a newly created one using some kind of XML-creation script) and replace
the questions.plist file that you just created for your new project
- with your new project loaded in xcode, go to Product->Clean.
- now try to build your project and it *should* start up exactly as desired
Once everything is in order, you can replace the icon of the newly created project using the previously discussed procedure so that you don't
confuse it with your original project when running them on your iphone. Another option is using the same icon but changing the "Bundle display
name" in the *Info.plist file to differentiate by name instead.
Click here if you would like to see how you would allow your app to launch one of several tests from the main screen.
Submitting the Application for Verification
There are several steps involved when submitting your application for public download from the iTunes store. The first is to test it on one/some of your own device(s) to make sure it works correctly. In order to do this, you have to register the device with Apple (as you've already done in the Running the app
on your own device section). If
the app is for personal use only, this step should be sufficient
If you want to submit your app for public use, you have to submit it to Apple for approval.
Because the procedure can change often, it is best to consult the Apple developer's site
for instructions. The current link as of this writing is here .
The following are some pointers for eventually getting your app into the app store. This site, was an invaluable aid in getting to the point where an app can be submitted to the app store. The steps are nicely arranged. Be aware though, that there can be administrative roadblocks at several steps that can cause delays that are out of your hands (the whole procedure took about 1 month for me). At a high level, the following are the steps I took and the approximate order I took them in:
- At the itunesconnect site, set up contract and banking information in contracts, tax, and banking pages. Canadian users beware that you may have to add leading zeros to your bank transit number until your bank is found.
- Add your app in itunesconnect->Manage your app (this can be done before all contracts, etc are finalized). Be aware that the Bundle ID and version
numbers that you assign here should match exactly the Bundle IDs and version numbers in your Project-info.plist file. You might also want to have a 1024x1024
master icon for your app handy that will be used in the itunes store to identify your app. You will also be asked to provide screen shot(s) in varying formats
so make sure you have some kind of an image manipulation program handy (I used paintbrush for Mac)
- Add a provisioning profile which uses your distribution certificate at the
developer member center. (certificates, identifiers, and profiles->iOS provisioning profiles). A provisioning profile must be created for each app you submit to the itunes store.
- Before validating your app you must successfully archive it in xcode through Product->Archive. This will check the certificate validity and will ensure
that you are not submitting an app that gives off compiler warnings.
- You will become very familiar with the Project->Build Settings Screen in xcode. Make sure that your Code signing identity entries are set with your distribution certificate. To overcome archive errors which are related to an invalid certificate, you may have to (re)create your distribution cert. To do this you will have to go to the developer member center , certificates, identifiers, and profiles, iOS Provisioning Profiles, and ensure that you have a valid distribution profile. If not, create one.
- Once you have successfully archived your app, you can bring up Window->Organizer->Archives in xcode and validate your app. If your app has been successfully
validated and setup correctly in itunesconnect and it is at status "ready to upload", you can upload your app for Apple validation by clicking on the submit button.
- After submission you may get an email from Apple indicating that there are some minor issues that fell through the cracks (e.g. you are now required
to submit a 120x120 icon for the new iphone 5 screensize). You would then have to add the icon to your project (Add file menu) and then add it to your
Project-info.plist file icons array. To resubmit you would have to reject your original binary in itunesconnect->Manage Your app->Your app->app details->binary details page and go through the archive->validate->submit process again
By: Rene Kondratzky